5 Types of Photos Every Electric Company Should Capture on the Job Site
In the electrical industry, taking photos on the job site is no longer just a “nice to have” — it’s becoming a standard part of professional fieldwork. Whether you’re working on power distribution, meter installations, or maintenance of switchgear, proper construction photo documentation can protect your business and keep your projects running smoothly.
Photos serve as visual proof of what was found, what was done, and what’s still pending. They’re especially useful when there’s a dispute with a client, a safety inspection, or a need to review past work. On top of that, they help keep everyone aligned — from field crews to office staff and subcontractors — even across multiple job sites.
But not all photos are useful. To get real value, your team needs to take the right types of photos, at the right moments during the job.
In this article, we’ll walk through five essential types of job site photos that every electric company should capture. These examples are based on real field experience and can help you improve quality control, safety compliance, and customer trust.
Table of Contents
1. Pre-Work Jobsite Conditions
Before any work begins, it’s important to document the condition of the worksite. This step is often skipped, but it can protect your team and your company later.
Why it matters:
Taking photos of the jobsite before you start work helps prove that any existing damage or safety issues were already there. It also gives context to your team and the client. If something goes wrong later, you’ll have a visual record of how the jobsite looked when you arrived.
What to capture:
- Broken or exposed wiring
- Damaged equipment or structures
- Limited access points or blocked areas
- Water, mud, or other environmental risks
- Confined spaces or fall hazards
Tip from the field:
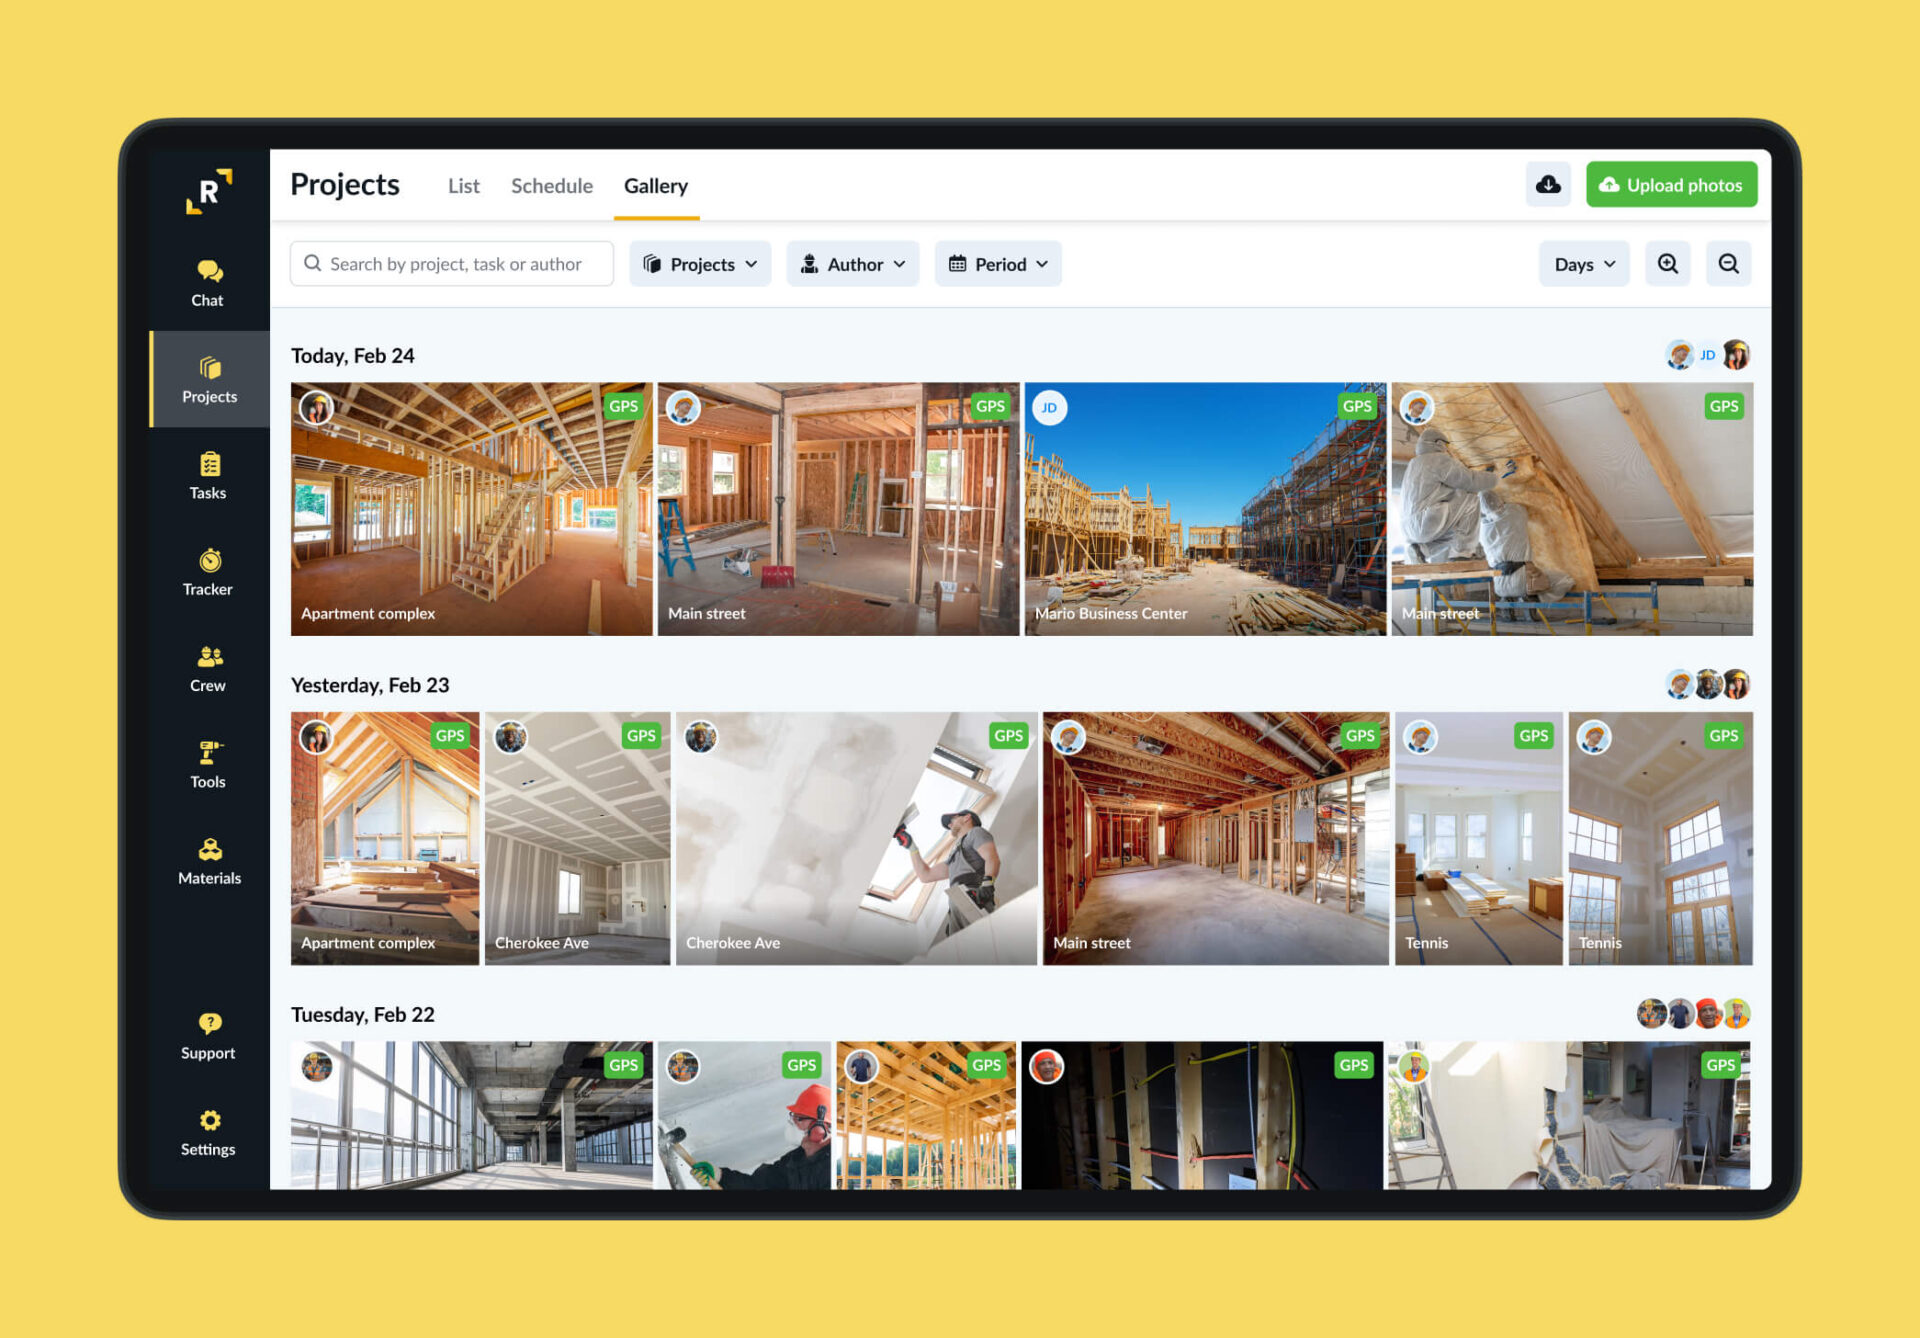
Take both wide-angle photos and close-ups. Wide shots show the full environment, while close-ups capture important details like cracks, corrosion, or unsafe conditions. If your crew is using a mobile app with GPS tagging, that’s even better — you’ll have proof of time and location.
2. Equipment Before Installation
Before your crew installs any equipment, it’s a smart move to take clear photos of the materials on jobsite. This step helps verify that the correct components were delivered and that they were in good condition before work began.
Why it matters:
Capturing photos before installation can prevent disputes about missing, damaged, or incorrect equipment. If there’s a question later — from the client, supplier, or even your own team — you’ll have visual proof of what was there.
What to capture:
- Switchboards, panels, or cabinets before mounting
- Meters, transformers, or disconnects still packaged
- Conduit, fittings, or cable reels on arrival
- Nameplates or serial numbers for inventory tracking
- Any signs of damage, rust, or weather exposure
Pro tip:
Include a reference like a job tag, delivery slip, or jobsite marker in the photo when possible. This helps link the image to a specific location or work order, especially when managing multiple deliveries across different projects.
3. In-Progress Work
Capturing photos during the work process helps create a clear timeline of what’s happening on jobsite. These images are useful for progress tracking, quality control, and internal communication — especially when supervisors or clients aren’t physically present.
Why it matters:
Photos taken during installation or repair work show how tasks are being completed, not just the final result. This can help detect issues early, support better coordination between teams, and provide documentation in case something needs to be redone or inspected later.
What to capture:
- Trenching and underground conduit runs before backfilling
- Wiring or cable pulling inside panels and raceways
- Temporary safety setups like barriers, signage, or personal protective equipment
- Mounting or assembly steps for switchgear, panels, etc.
- Team members at work (helps show manpower and methods)
Pro tip:
Try to take photos at key milestones — for example, after rough-in but before drywall, or once major cable runs are complete. Make sure your crew knows when to stop and snap a few photos. A few extra seconds can save hours later.
4. Completed Work
Photos of completed work are some of the most important images your company can collect. They serve as proof of quality, evidence for billing, and a valuable reference for future maintenance or troubleshooting.
Why it matters:
These photos show that the job was done according to plan — clean, correct, and compliant. If a customer questions the work or if another team needs to return to the jobsite later, these images can help avoid confusion, save time, and back up your crew.
What to capture:
- Final panel or meter installations, clearly wired and labeled
- Junction boxes, disconnects, or cable terminations sealed and closed
- Completed trenching or conduit runs, filled and restored
- Test results or readings, shown on instruments or meters
- Any labeling, signage, or markings required by code or the client
Pro tip:
Make sure completed work photos are well-lit, in focus, and taken from a clear angle. Blurry or dark photos don’t help anyone later. If your company uses checklists or inspections, match photos to those steps for extra accountability.
5. Safety Compliance & Signage
Job site safety isn’t just about following the rules — it’s about proving that your team takes safety seriously. Photos that show proper safety setups and compliance can help protect your company from liability, fines, or misunderstandings after the job is done.
Why it matters:
If there’s ever an accident, complaint, or inspection, having photo evidence of personal protective equipment use, lockout/tagout procedures, and hazard warnings can make a big difference. These images show that your company is following regulations and putting worker safety first.
What to capture:
- Team members wearing proper personal protective equipment (helmets, gloves, glasses, etc.)
- Barricades, cones, warning tape, or temporary fencing
- Lockout/tagout devices and isolation signs
- Permit boards or safety instructions
- Weather-related hazards like mud, ice, or lightning warnings
Pro tip:
Make it a habit to snap safety photos during both the start-of-day setup and throughout the shift. It’s easy to overlook, but this documentation can be extremely valuable during audits, investigations, or insurance claims.
Bonus Tip: Organizing and Tagging Photos

Taking job site photos is important — but how you organize them makes all the difference. If images are just sitting in someone’s phone gallery with no labels, they’re hard to find and easy to forget.
Why it matters:
Photos are most useful when they’re linked to a specific project, location, or work order. Without structure, even the best photos can get lost or misused. Good organization improves reporting, speeds up client communication, and simplifies project reviews.
How to do it better:
- Use a mobile app that automatically tags photos with project name, date, and GPS location
- Create standard folders for each type of photo (e.g. Pre-Work, In-Progress, Completed) and follow consistent construction photo management practices to keep everything organized.
- Include short captions or notes when uploading, especially for unusual situations
- Make sure field teams know when and what to document — a quick checklist can help
Pro tip:
A centralized platform like Remato makes it easy to manage job site photos across your whole company — keeping your documentation clean, consistent, and easy to access from anywhere.
Conclusion
For electric companies, photo documentation is no longer just a backup — it’s a core part of professional operations. From proving work was done correctly to protecting your team in case of disputes, the right photos can save time, money, and stress.
To recap, here are the five types of photos every electric company should be capturing on the job site:
- Pre-Work Job Site Conditions
- Equipment Before Installation
- In-Progress Work
- Completed Work
- Safety Compliance & Signage
Getting your crew into the habit of taking these photos — and storing them in an organized way — helps create a stronger, safer, and more transparent workflow. It’s not about taking more photos. It’s about taking the right ones, at the right moments, with a clear purpose.
If you’re ready to bring structure and consistency to your job site documentation, tools like Remato photo management app can make it simple to capture, tag, and manage your photos — all in one place.
